Estimated time to complete: 10 minutes

Overview
Welcome to Magma! 🌋 This template will help you create an agent that can send and manage emails through your Gmail account. It involves:- Creating a Google Cloud Project
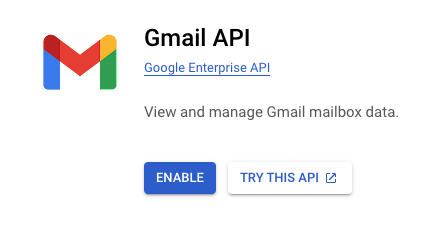
- Enabling the Gmail API
- Creating OAuth credentials
- Using the credentials to authenticate your agent with Gmail
Getting Started
Google Cloud Setup
In order to create an agent that can interact with Gmail, we need to create a Google Cloud Project, enable the Gmail API, and create OAuth credentials.Create Google Cloud Project
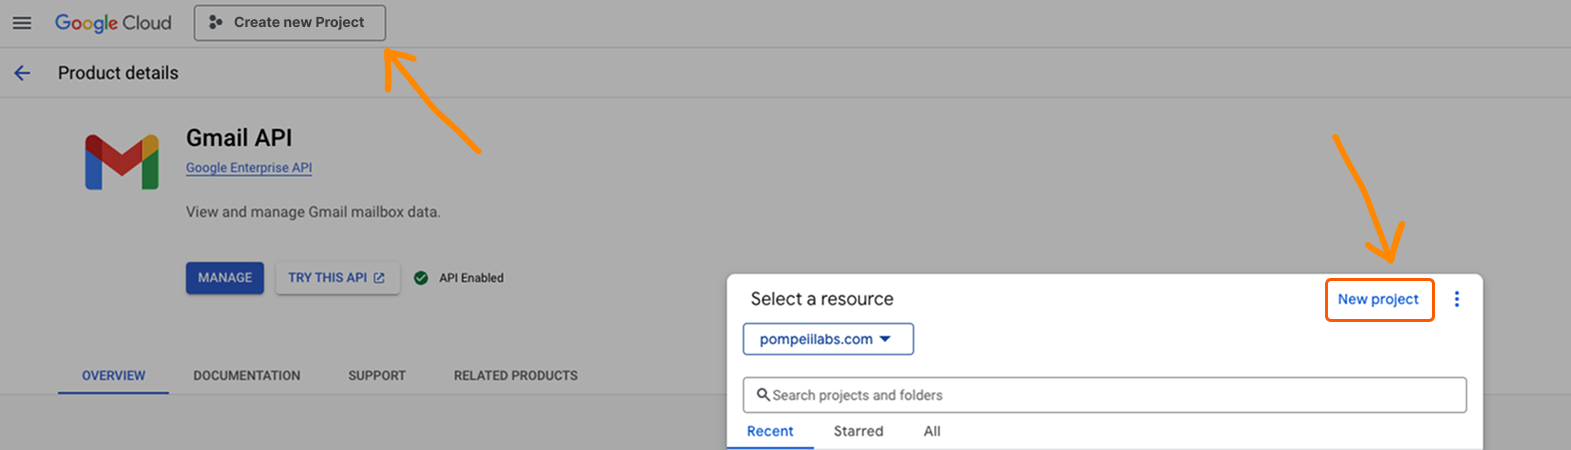
- Go to Google Cloud Console
- Create a new project or select an existing one

Configure OAuth Consent
- Go to “APIs & Services” > “OAuth consent screen”
- For “User type”, select “Internal” if you want people in your organization to use the agent. Otherwise, select “External” (you will have to add your email to test users later in order to use the agent)
- Fill in the required app information (this can be changed later, don’t worry about it for now)
- On the Scopes screen, click “Add or Remove Scopes” in the middle of the screen.
- Under “Manually Add Scopes”, add the following scope:
https://mail.google.com/ - Click “Add to Table”
- Click “Update”
- At the bottom of the screen, click “Save and Continue”
Create OAuth Credentials
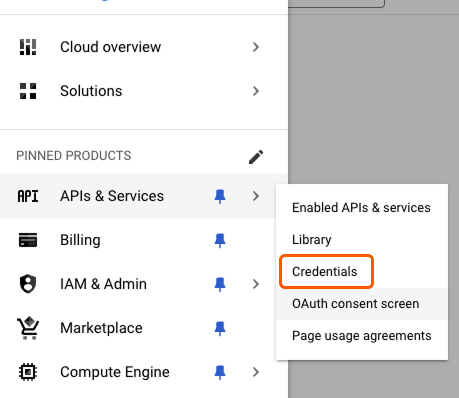
- Go to “APIs & Services” > “Credentials”
- At the top of the screen, click “Create Credentials” > “OAuth Client ID”
- Select “Web application” for your application type
- For “Authorized redirect URIs”, add the following two values
Remember when I said you’d need that agent id? Replace
AGENT_ID in the redirect URIs with your actual agent id!Copy Client ID and Secret
Copy the 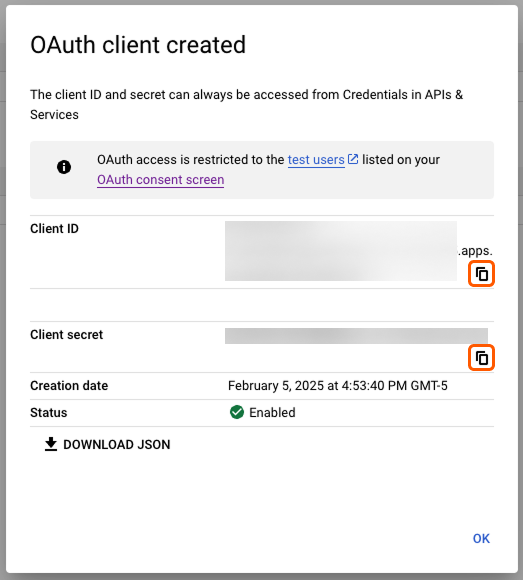
Client ID and Client Secret values. We will need them in the next step.Testing and Deployment
Local Testing
Run the agent locally to test the OAuth flow. When you ask your agent to authenticate you with Google, it should print out a google oauth url.After you authenticate, you should see a
credentials.json file in the root of your project. This means it’s working!Deploy
Once you have verified your agent is working locally, you can deploy it to magma and start interacting with your Gmail!Before you deploy, make sure to update the
GOOGLE_REDIRECT_URI in your .env file to the production redirect uri (https://api.magmadeploy.com instead of localhost).Troubleshooting
Authentication Issues
Authentication Issues
If authentication fails:
- Verify credentials in
.envfile - Ensure redirect URI matches exactly in Google Cloud Console
- Confirm Gmail API is enabled
Email Sending Issues
Email Sending Issues
If emails aren’t sending:
- Verify OAuth tokens are valid
- Check if
credentials.jsonexists - Ensure Gmail API scope is authorized
Common Issues
Common Issues
- Invalid redirect URI: Double-check exact matches
- Missing scopes: Verify
https://mail.google.com/is included - Expired tokens: May need re-authentication
Need Help?
Contact our support team for assistance
Join Community
Connect with other Magma developers